Key Takeaways
- Filter Replacements: For the best-tasting water, you must change your water filters every 6 to 12 months.
- Pre-Filters: Always change your sediment and carbon pre-filter on time. This protects the delicate RO membrane from costly damage.
- RO Membrane: The main purifying part of your reverse osmosis water system is the membrane, which typically lasts 2 to 3 years.
- Sanitization: Clean and sanitize your entire RO system once a year to prevent harmful bacteria build-up in the tank and water lines.
- Professional Help: Sticking to strict replacement schedules extends the life of your system. If you are unsure how to do it, hire a local professional to test and service your equipment.
A reverse osmosis water system is one of the smartest investments you can make for your home. It provides endless, great-tasting, clean drinking water right from your kitchen sink. Families love these systems because they remove foul odors, bad tastes, and invisible contaminants that regular pitchers and fridge filters leave behind.
But a water filtration setup is not a “set it and forget it” appliance. Just like your car requires regular oil changes and tire rotations, your drinking water setup requires routine care to keep running smoothly.
If you are a new owner, or an owner who has lost track of time, you might be asking yourself: how often should you maintain your reverse osmosis system?
You are in the right place. In this detailed homeowner’s guide, we will break down the exact maintenance steps, the best replacement schedules for your filters, and how to know when it is time to call a professional for help.
What Exactly Is Reverse Osmosis?
Before we talk about how to maintain the equipment, it helps to understand how it works.
Reverse osmosis is a highly effective water purification process. It uses normal household water pressure to push tap water through a semi-permeable membrane. This membrane has tiny, microscopic pores.
The pores are small enough that clean water molecules can pass through, but heavier molecules, like lead, fluoride, chlorine, and harsh minerals, are blocked and washed down the drain.
Because the membrane is so sensitive, it cannot do the job alone. It relies on a team of protective water filters to do the heavy lifting before the water ever reaches the membrane. If these protective filters fail, the whole reverse osmosis system fails.
Why Regular Maintenance Matters
Your RO system works tirelessly behind the scenes. Every time you fill a pot for boiling pasta or grab a glass of ice water, water is being forced through multiple layers of filtration.
Over time, these filters act like a sponge. They fill up with dirt, sand, rust, and harsh chemicals. If you skip your routine maintenance, several bad things will happen:
- Lower Water Pressure: When a filter gets clogged with debris, it blocks the flow of water. You will notice that it takes much longer to fill up a simple glass of water.
- Poor Tasting Water: The carbon filters in your system are responsible for removing chlorine and bad tastes. When they get old, they stop absorbing these chemicals. Your water might start tasting like swimming pool water or smelling metallic.
- Severe Damage to the System: This is the most costly mistake homeowners make. If a pre-filter gets totally clogged, harsh chemicals like chlorine can slip through and reach the sensitive RO membrane. Chlorine will quickly eat holes in the membrane, destroying it completely.
- Bacterial Growth: If you let filters sit for years in dark, wet spaces without cleaning the storage tank, bacteria can begin to grow inside the system.
Your Complete Filter Replacement Schedule
To get the absolute best performance out of your investment, you need to stick to strict replacement schedules. While every brand has slight differences, the timeline for a standard home system usually follows these four steps:
- The Sediment Pre-Filter (Every 6 to 12 Months) – The very first stop for tap water entering your system is the sediment pre-filter. This cartridge catches large, physical particles like sand, dirt, silt, and rust from old pipes.
If you live in a rural area with hard well water, you might need to change this cartridge every 6 months. If you live in a city with treated municipal water, it might last closer to 12 months.
- The Carbon Pre-Filter (Every 6 to 12 Months) – Next up is the carbon block filter. Its main job is to absorb and remove chlorine and chloramines from the water. This is a critical step because chlorine will quickly destroy an RO membrane.
Just like the sediment filter, you should schedule your filter replacements for the carbon cartridge every 6 to 12 months. Changing this on time is the best way to protect the rest of your equipment.
- The Reverse Osmosis Membrane (Every 2 to 3 Years) – The membrane is the true heart of your reverse osmosis water system. It removes up to 99% of microscopic impurities, heavy metals, and dissolved solids. Because the pre-filters do the hard work by catching the big dirt and chemicals, the membrane can last a long time. You usually only need to replace this part every 2 to 3 years.
- The Polishing Post-Filter (Every 12 Months) – After the water is purified, it sits in a small storage tank until you turn on the faucet. As the water leaves the tank, it passes through one final filter. This is often called the polishing filter.
It removes any stale tastes or odors that the water might have picked up while sitting in the pressurized tank. You should change this filter once every year.
How to Sanitize Your RO System
Changing your filters is only half of the maintenance equation. You also need to clean the inside of the system and the storage tank. We highly recommend sanitizing your setup once a year.
Easy Steps for Annual Sanitization:
- Shut off the water: Turn off the cold water supply valve under the sink. Also, shut off the valve on top of the storage tank.
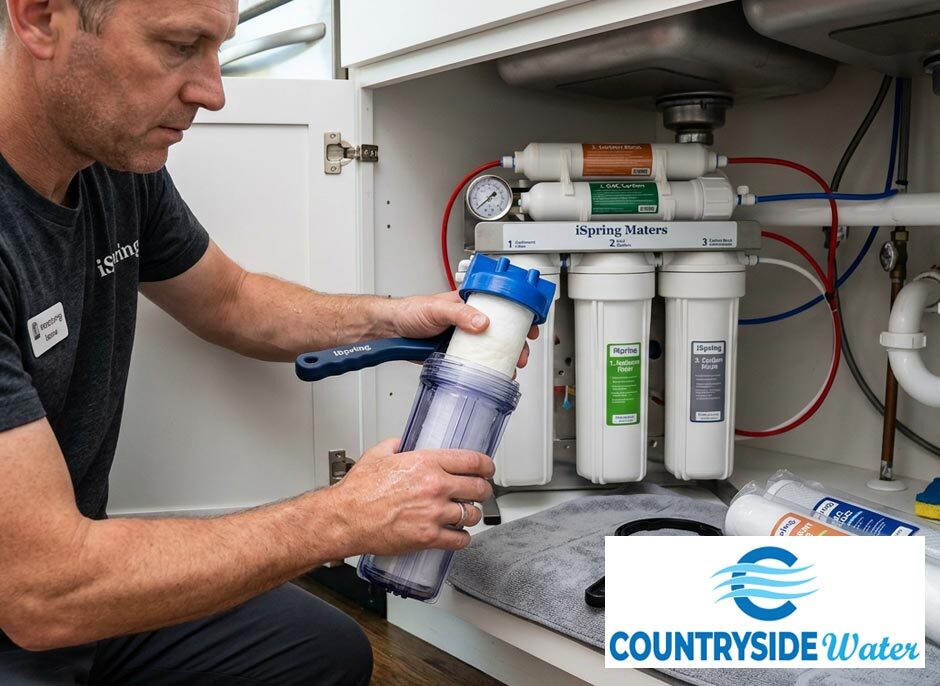
- Remove all filters: Use a filter wrench to open the housings. Take out the pre-filters, the RO membrane, and the post-filter.
- Add a safe sanitizer: Use an unscented, food-grade bleach or a packet of specialized system sanitizer. Pour this directly into the first empty filter housing and screw the housing back on.
- Run the water: Turn the main water supply and the tank valve back on. Let the tank fill completely with the sanitizing water. Then, open the faucet at the sink and let all the water drain out.
- Rinse thoroughly: Let the system fill and drain one or two more times to ensure absolutely no sanitizer is left behind in the lines or the tank.
- Install new filters: Once the entire system is clean and rinsed, insert your fresh filters and membrane.
Signs Your System Needs Immediate Attention
Even if you follow all the rules, things can sometimes go wrong. Watch out for these warning signs that tell you it is time for emergency maintenance:
- Slow Water Flow: If it takes three minutes to fill a single glass of water, your filters are likely severely clogged, or your storage tank has lost its internal air pressure.
- Cloudy or Bad Tasting Water: If your water tastes sour, smells like chlorine, or looks cloudy, your carbon filter or membrane has failed.
- The System Won’t Stop Running: You should only hear water running down the drain when the tank is actively filling. If you hear water running into the drain all day long, you likely have a broken auto-shutoff valve or a ruptured membrane.
DIY Maintenance vs. Professional Help
Many homeowners choose to handle their own maintenance. If you are handy with basic tools, twisting off the filter housings and dropping in new cartridges is fairly easy.
However, calling a trained professional from Countryside Water has massive benefits. A professional can:
- Use a pressure gauge to check your tank and ensure it is holding air properly.
- Test the water quality with a TDS (Total Dissolved Solids) meter to guarantee the membrane is actually working.
- Inspect all the plastic tubing and fittings for tiny leaks that you might not notice.
- Safely sanitize the entire system without damaging any delicate parts.
Taking care of your system is the only way to guarantee your family has safe, great-tasting water for years to come.
Frequently Asked Questions About Reverse Osmosis Maintenance
How do I know if my reverse osmosis filters need to be changed early?
The most common sign is a sudden drop in water pressure at your dedicated faucet. If filling a glass takes significantly longer than usual, or if you notice a change in the taste or odor of your water (such as a chlorine smell), your pre-filters are likely clogged and need immediate replacement.
What happens if I delay changing my RO pre-filters?
Delaying pre-filter replacements allows sediment to clog the system and permits chlorine to reach the delicate reverse osmosis membrane. Chlorine quickly breaks down the membrane’s microscopic pores, permanently damaging it and allowing heavy metals, chemicals, and dissolved solids into your drinking water.
How often should the RO storage tank be sanitized?
You should sanitize your reverse osmosis storage tank and water lines at least once a year. Performing this step during your routine 6- to 12-month filter change prevents bacteria and mold build-up inside the pressurized tank.
How do I test if my reverse osmosis membrane is still working?
You can test your system’s performance using a Total Dissolved Solids (TDS) meter. Measure the TDS level of your raw tap water and compare it to the TDS level of your RO water. A healthy membrane should remove 90% to 99% of dissolved solids. If the reduction is significantly lower, it is time to replace the membrane.
Can I perform RO maintenance myself, or should I hire a professional?
While replacing basic twist-off filter cartridges can be a straightforward DIY project, hiring a local professional from Countryside Water ensures your system is thoroughly serviced. A technician will check storage tank pressure, conduct precise TDS testing, inspect for subtle tubing leaks, and safely sanitize the system without damaging internal valves.